How to install a suspended ceiling in Québec
SZ STRONG BUILD ·
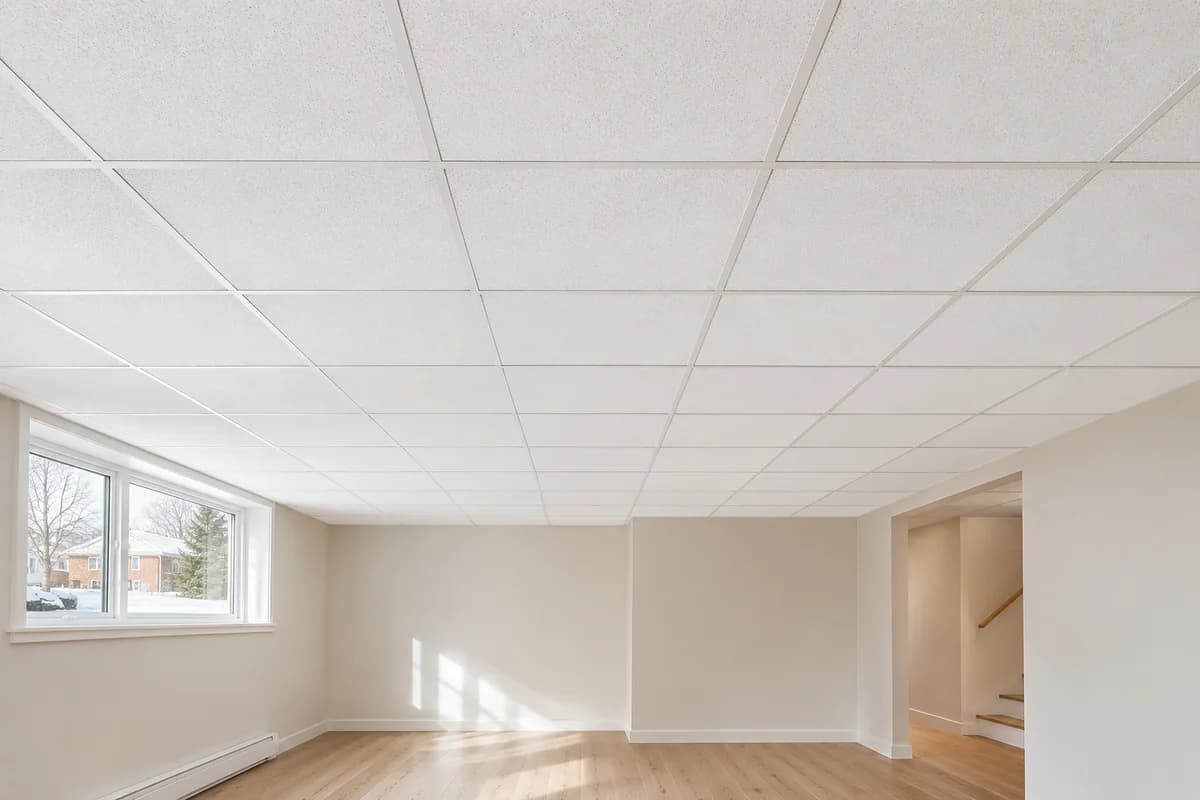
Measure obstructions, set the finished height and plan the grid before installation. Verify the selected system’s fixings and access to services before closing the ceiling. This guide focuses on lay-in tiles on an exposed T-grid.
Contents
- Choose the ceiling system
- 1. Survey the room
- 2. Set the finished height and access
- 3. Balance the layout before cutting
- 4. Prepare components and the site
- 5. Fit perimeter trims, hangers and runners
- 6. Coordinate equipment and close the ceiling
- 7. Inspect the finished ceiling
- Frequently asked questions
- Plan the ceiling before installation
Choose the ceiling system
Lay-in tiles sit on a visible T-grid. Clip-in metal panels need dedicated carriers, while aluminium honeycomb panels need a compatible substructure and fixing detail. Compare module sizes, edge trims and removal access before ordering. For metal options, see the SZ STRONG BUILD aluminium ceiling panels.
| System | How it fits | Check before installation |
|---|---|---|
| Exposed T-grid | Tiles rest on a visible grid. | Module, edge trim and removal clearance. |
| Clip-in metal panels | Panels engage dedicated carriers. | Carrier references, release method and access. |
| Aluminium honeycomb panels | Mechanical fixing to a compatible substructure. | Joints, edges, fastenings and handling. |
1. Survey the room
Measure all sides and diagonals. Mark beams, ducts, pipes, changes in level, doors and wall junctions. Locate valves and equipment and allow space for tools and removal. If older materials might contain asbestos, have them assessed by a qualified professional before drilling or removal.
2. Set the finished height and access
Measure from the finished floor and check the lowest obstruction. Allow for fitting and future removal, then test a sample tile at the tightest spot. Confirm local requirements for the room’s use and municipality before marking the shared level.
3. Balance the layout before cutting
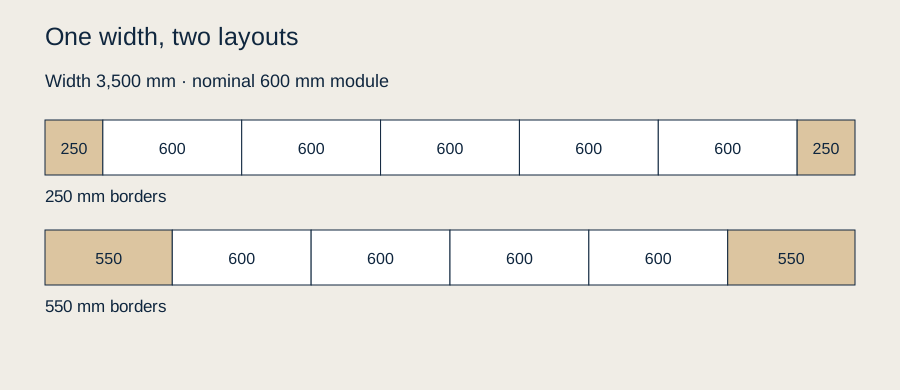
Compare a centred tile with a centred joint and coordinate lights. For a 3,500 mm width and nominal 600 mm module, five full modules leave two 250 mm borders. Four leave two 550 mm borders. Border = (room width − full modules × module width) ÷ 2. Repeat in the other direction. Confirm actual cut sizes against the edge and support detail. Count tiles and possible reusable cuts from the drawing, allow agreed spares, and list runners, cross tees, trims, hangers and fixings separately.
4. Prepare components and the site
Collect the layout, installation instructions and equipment details. Check delivered parts for compatibility and damage. Protect finished faces, use a stable work platform and suitable cutting tools, and locate services before drilling. Fix leaks and condensation and verify permitted site conditions before closure.
5. Fit perimeter trims, hangers and runners
Transfer the level to the perimeter. Match trim fixings to the substrate and locate hangers from the approved plan. Anchor layout, spacing, loads and bracing depend on the support and selected system. Resolve obstructions before moving a hanger. The US UFGS acoustical ceiling specification is a technical reference for coordination and suspension. Québec requirements apply separately. Engage compatible cross tees and check level, alignment and square before adding tiles.
6. Coordinate equipment and close the ceiling
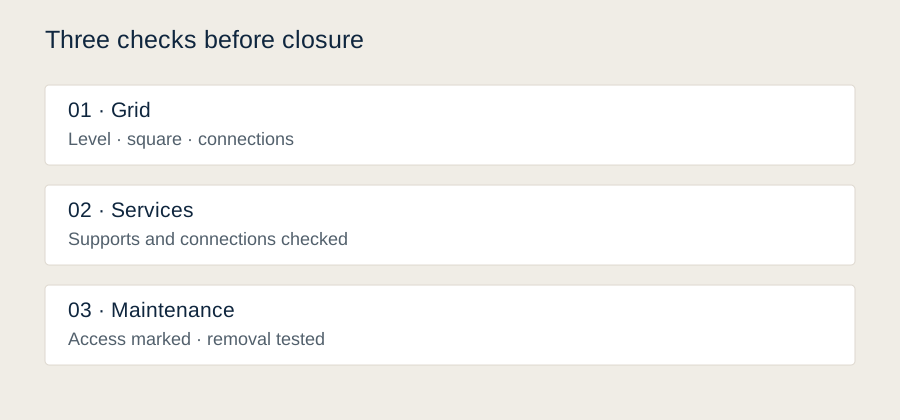
Confirm supports for lights, air outlets and other services. Verify connections and maintenance access before closure. Have the project team review sprinklers, detection and fire-rated penetrations where applicable. Handle tiles with clean hands, follow the pattern direction, measure each opening, cut as specified and test tile removal at service points.
7. Inspect the finished ceiling
Inspect edges, cuts, joints and damage from several angles under normal lighting. Keep the services plan, component references and spare pieces. Compare quotations with the same scope, including preparation, grid, tiles, cutouts, equipment, disposal and applicable taxes. Québec’s consumer protection office recommends checking the contractor’s licence and comparing detailed descriptions.
| Observation | What to check | Next step |
|---|---|---|
| Uneven joints | Square, connections and cuts. | Correct the grid or cut before acceptance. |
| Tile hard to remove | Clearance and plenum obstructions. | Review access or removal detail. |
| Staining or distortion | Leaks, condensation and panel condition. | Correct the cause before replacing. |
| Equipment distorts grid | Support, load and fixing detail. | Have the assembly checked. |
Frequently asked questions
How much clearance is needed?
Use the selected system’s clearance and test tile removal at the lowest obstruction.
Can hangers attach to pipes?
Use approved structural supports. Resolve conflicts on the plan with the project team.
Will a suspended ceiling soundproof a basement?
Room reverberation and sound transmission between floors are different objectives. Request evidence for the assembly and the performance you need.
Who should install lights?
Use an authorised trade for electrical work and coordinate fixture locations before closing the ceiling.
Can an aluminium panel replace a tile?
Only where the panel, supports, fixings and suspension are designed to work together.
Plan the ceiling before installation
Agree the system, finished height, layout, supports and access first. For an aluminium option, share the ceiling plan, dimensions, room use and access points.